Backup Destinations
Digital Ocean Spaces
A guide on how to set up Digital Ocean Spaces as a cloud destination for Craft Remote Backup
Overview
Digital Ocean Spaces is easy to set up. You need to create a new Space via the Digital Ocean control panel and then create a new API key to give access.
Setup
Digital Ocean Spaces implement the AWS S3 SDK exactly, we are actually using the AWS PHP SDK behind the scenes to connect to Digital Ocean Spaces.
Therefore to get started, first install the official AWS PHP SDK:
composer require aws/aws-sdk-php:^3
Configure Digital Ocean
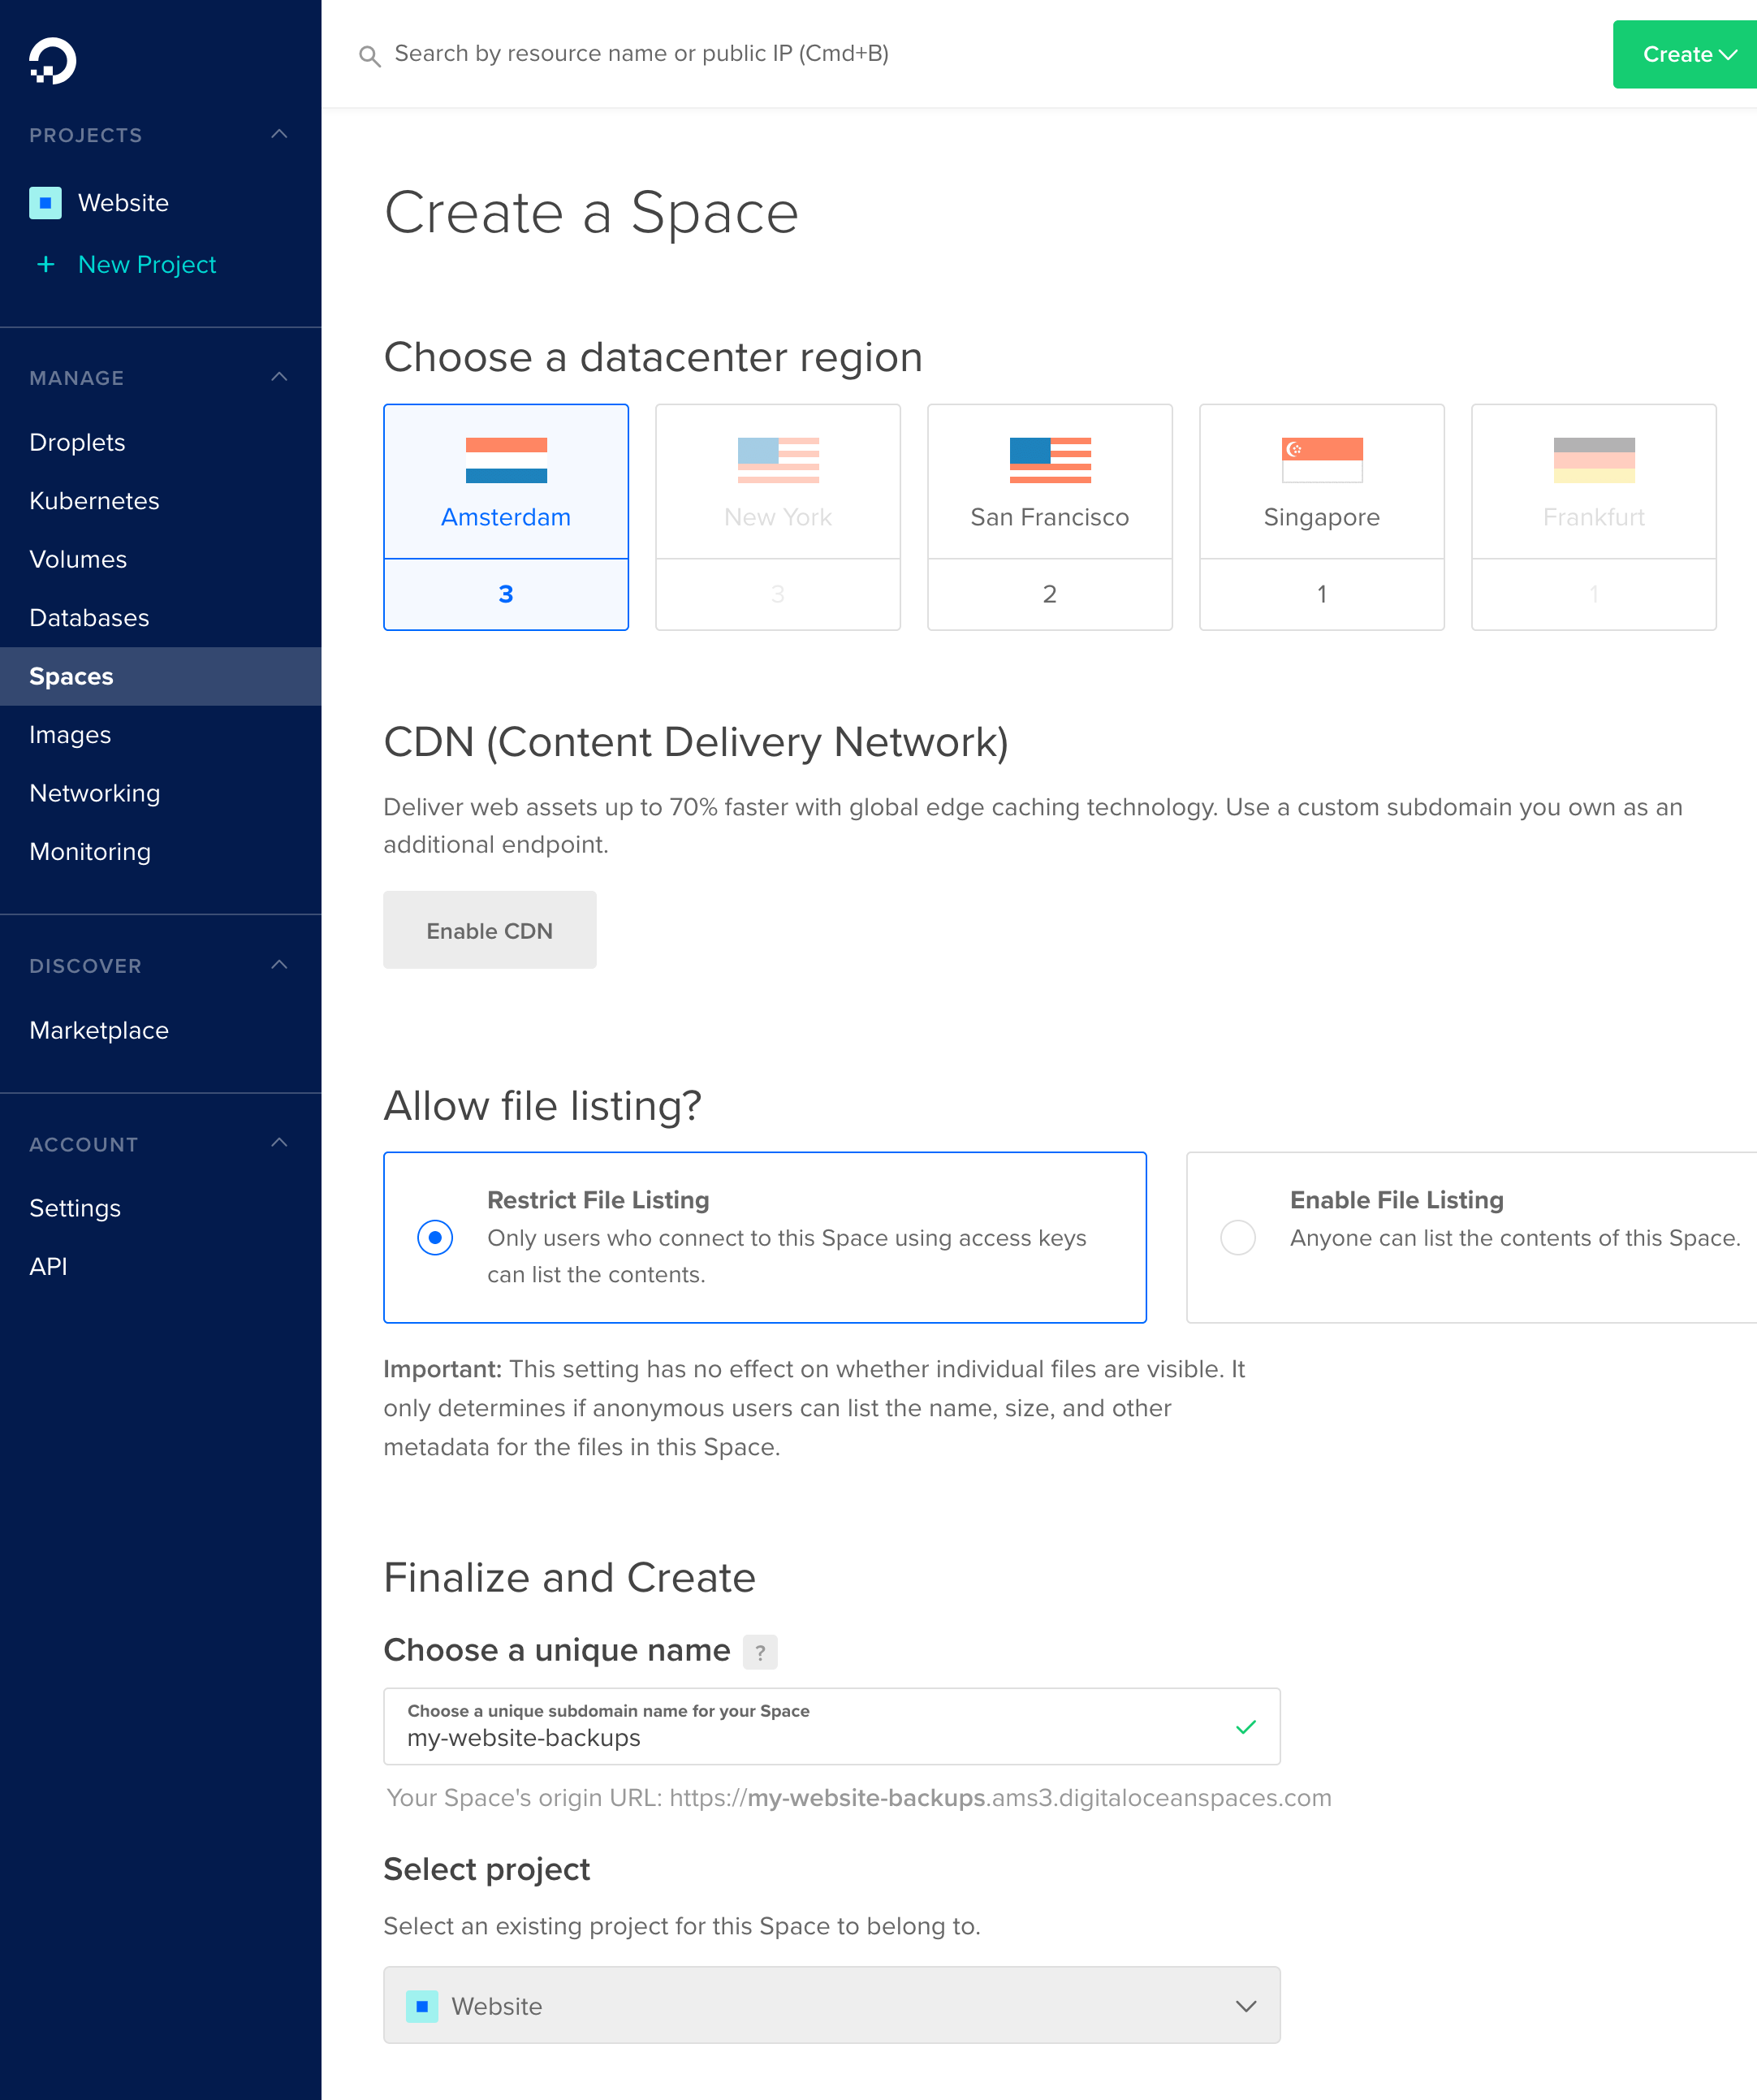
First log in to your Digital Ocean account and create a new space:

Make sure to "Restrict File Listing" so that your backups are not public
Once created, take note of the URL for your new space at the top of the screen:

In particular, take note of the region (here it's ams3)
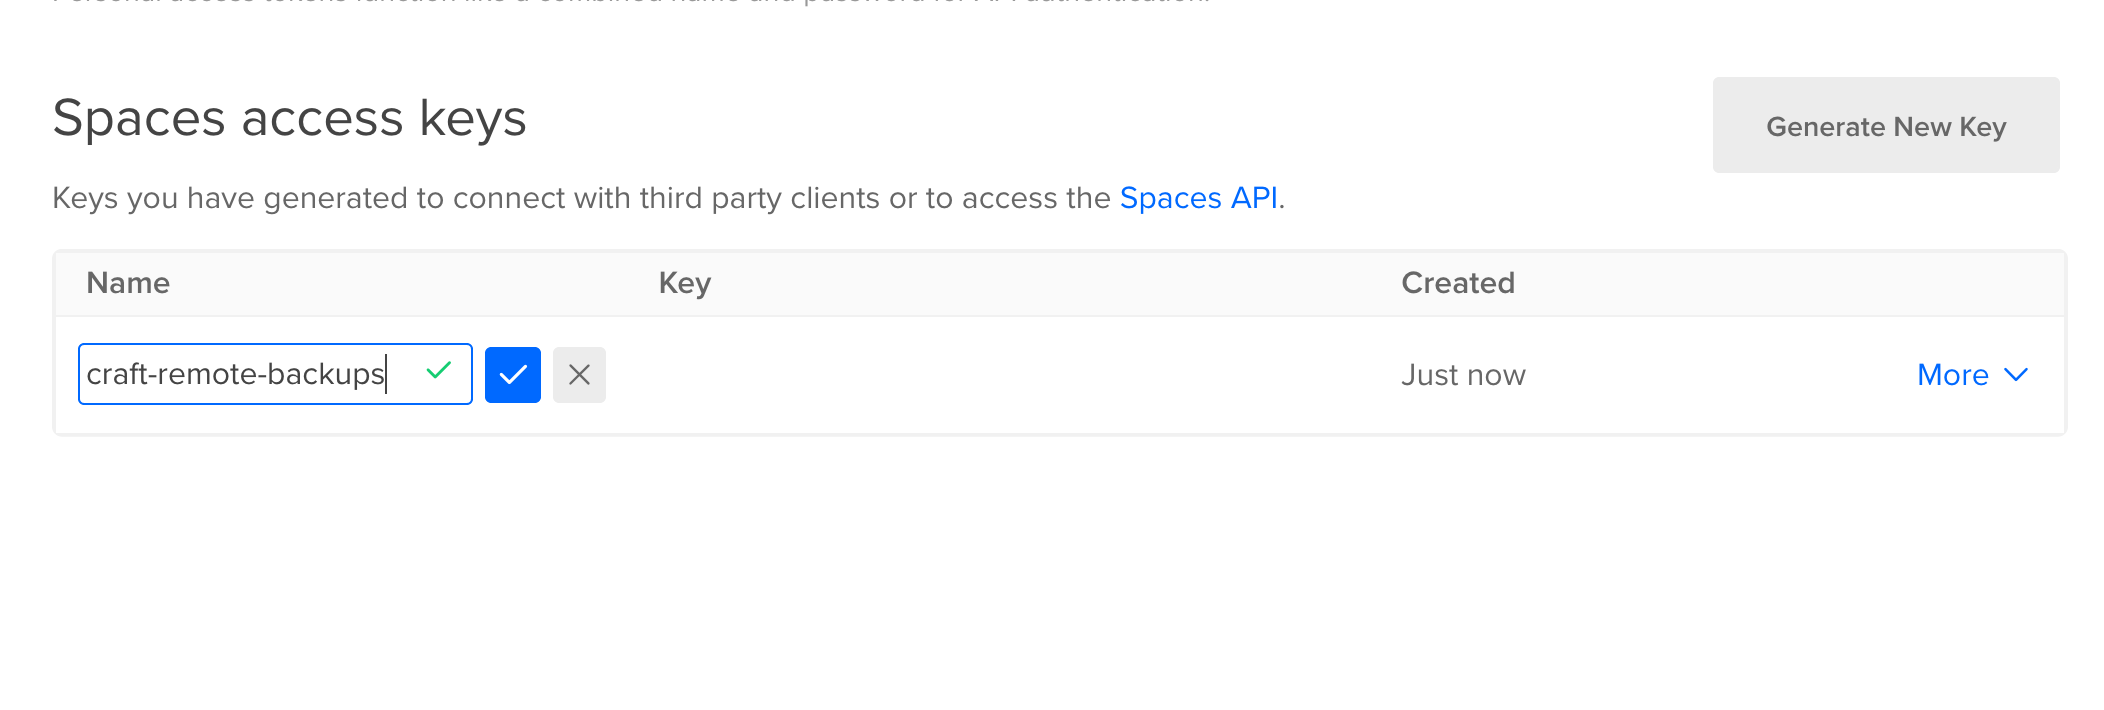
Hit "API" in the sidebar and "Generate New Key" in the "Spaces Acccess Key" section:


Make sure to note down the name of your new Space as well as the access key and secret key.
Configure Remote Backup
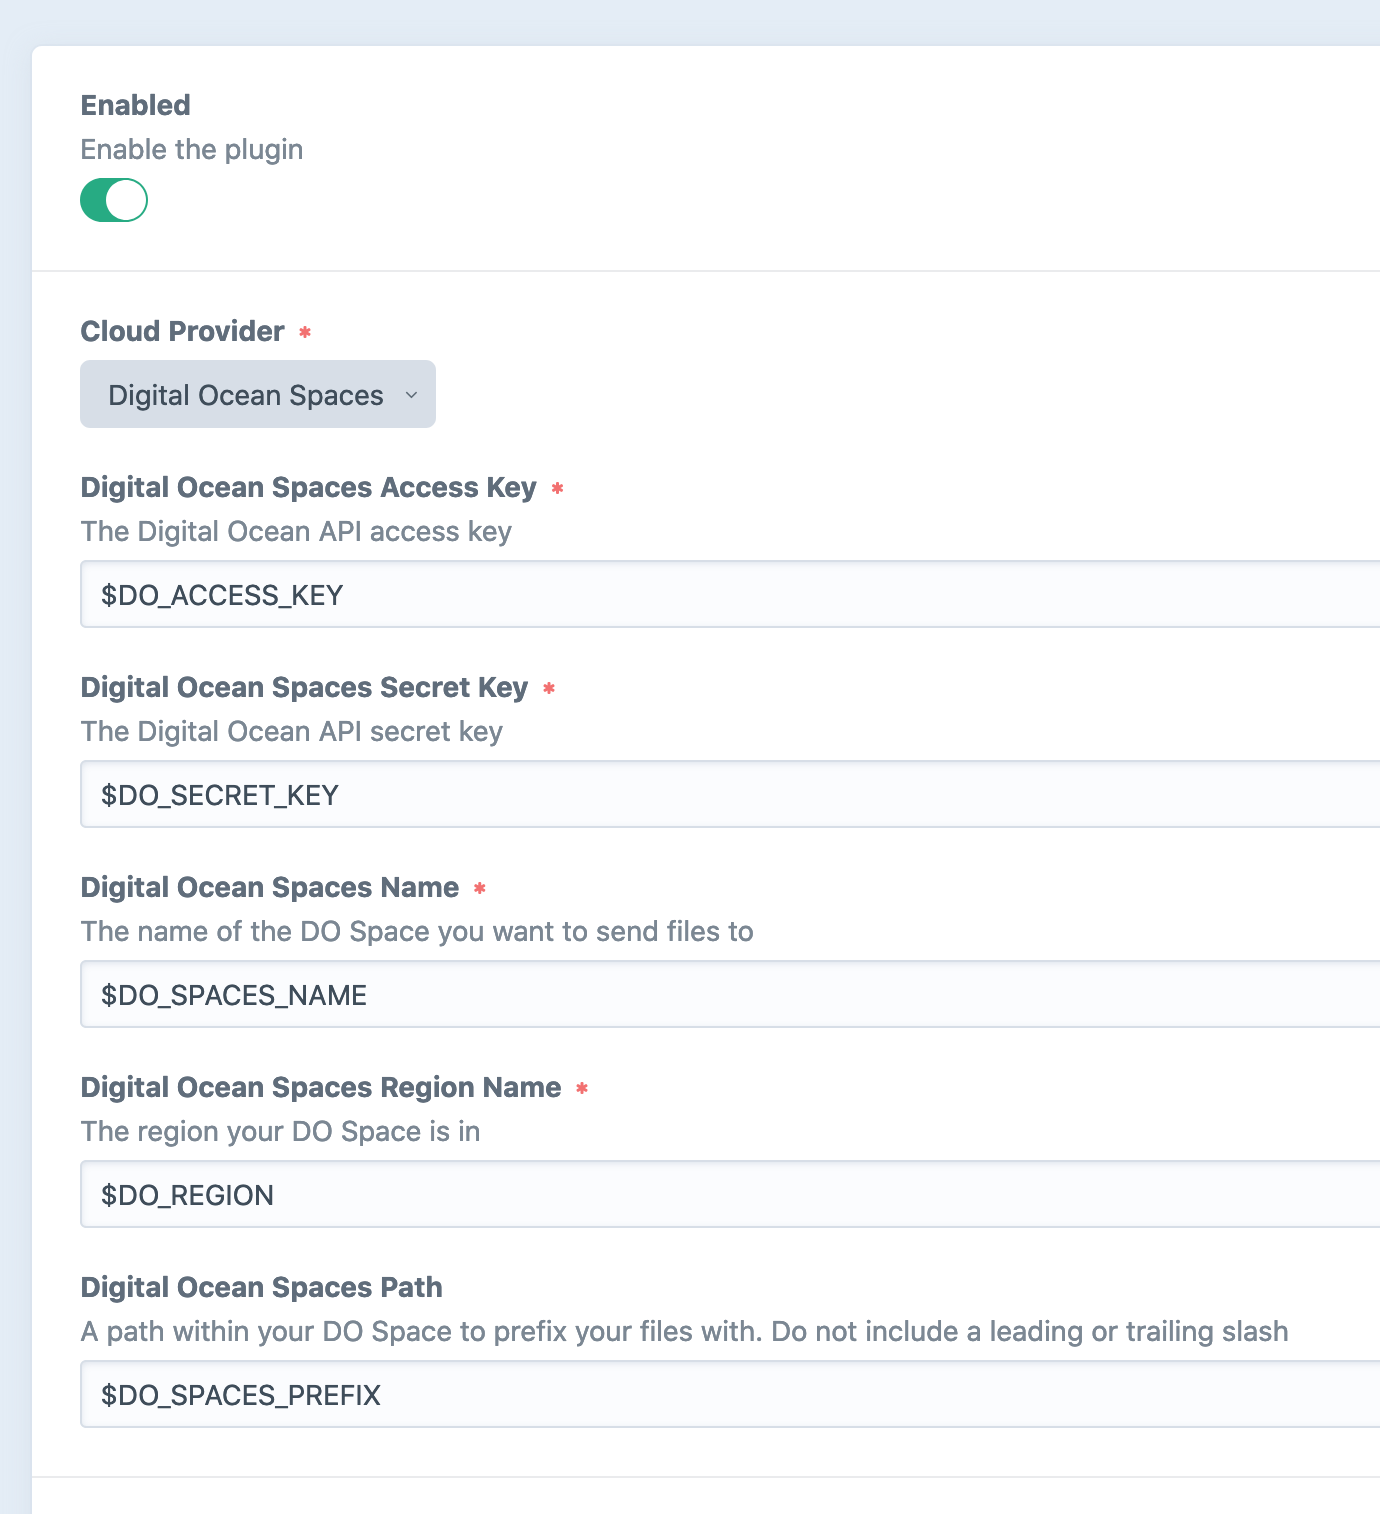
We now need to add the credentials to our Craft project. The best way to do this is to create some environment variables in our Craft project's .env file:
DO_ACCESS_KEY = ...
DO_SECRET_KEY = ...
DO_REGION = "ams3"
DO_SPACES_NAME = "my-website-backups"
DO_SPACES_PREFIX = "craft-sync/craft-test"
Now go to the Remote Backup settings page in the Control Panel and save these variables:

You should now be able to create new backups.
Optional Bucket Folder Path

You can add an optional folder path within your bucket to save backups. Make sure the path doesn't beging or end with a slash and also only contains letters, numbers and -/_:
Valid examples:
project-xyz/backupsmy-backups
Invalid example:
Project XYZ/backups/project-xyz/backups/my-backupsmy-backups/
Troubleshooting
If you are encountering errors, first check your credentials. After that, have a look in storage/logs/web.log for errors. Usually these issues are related to credentials or folder paths. If you're still having trouble, see the troubleshooting section.


