Introduction
Configuration
Configuration of the plugin is handled via the Craft plugin settings page.

There are three steps you need to take to fully configure the plugin:
- Decide on where uploaded screenshot assets will be saved.
- Configure which matrix fields you want to use the plugin with.
- Configure the actual previews, uploading screenshots and adding explanations.
Configuring asset location
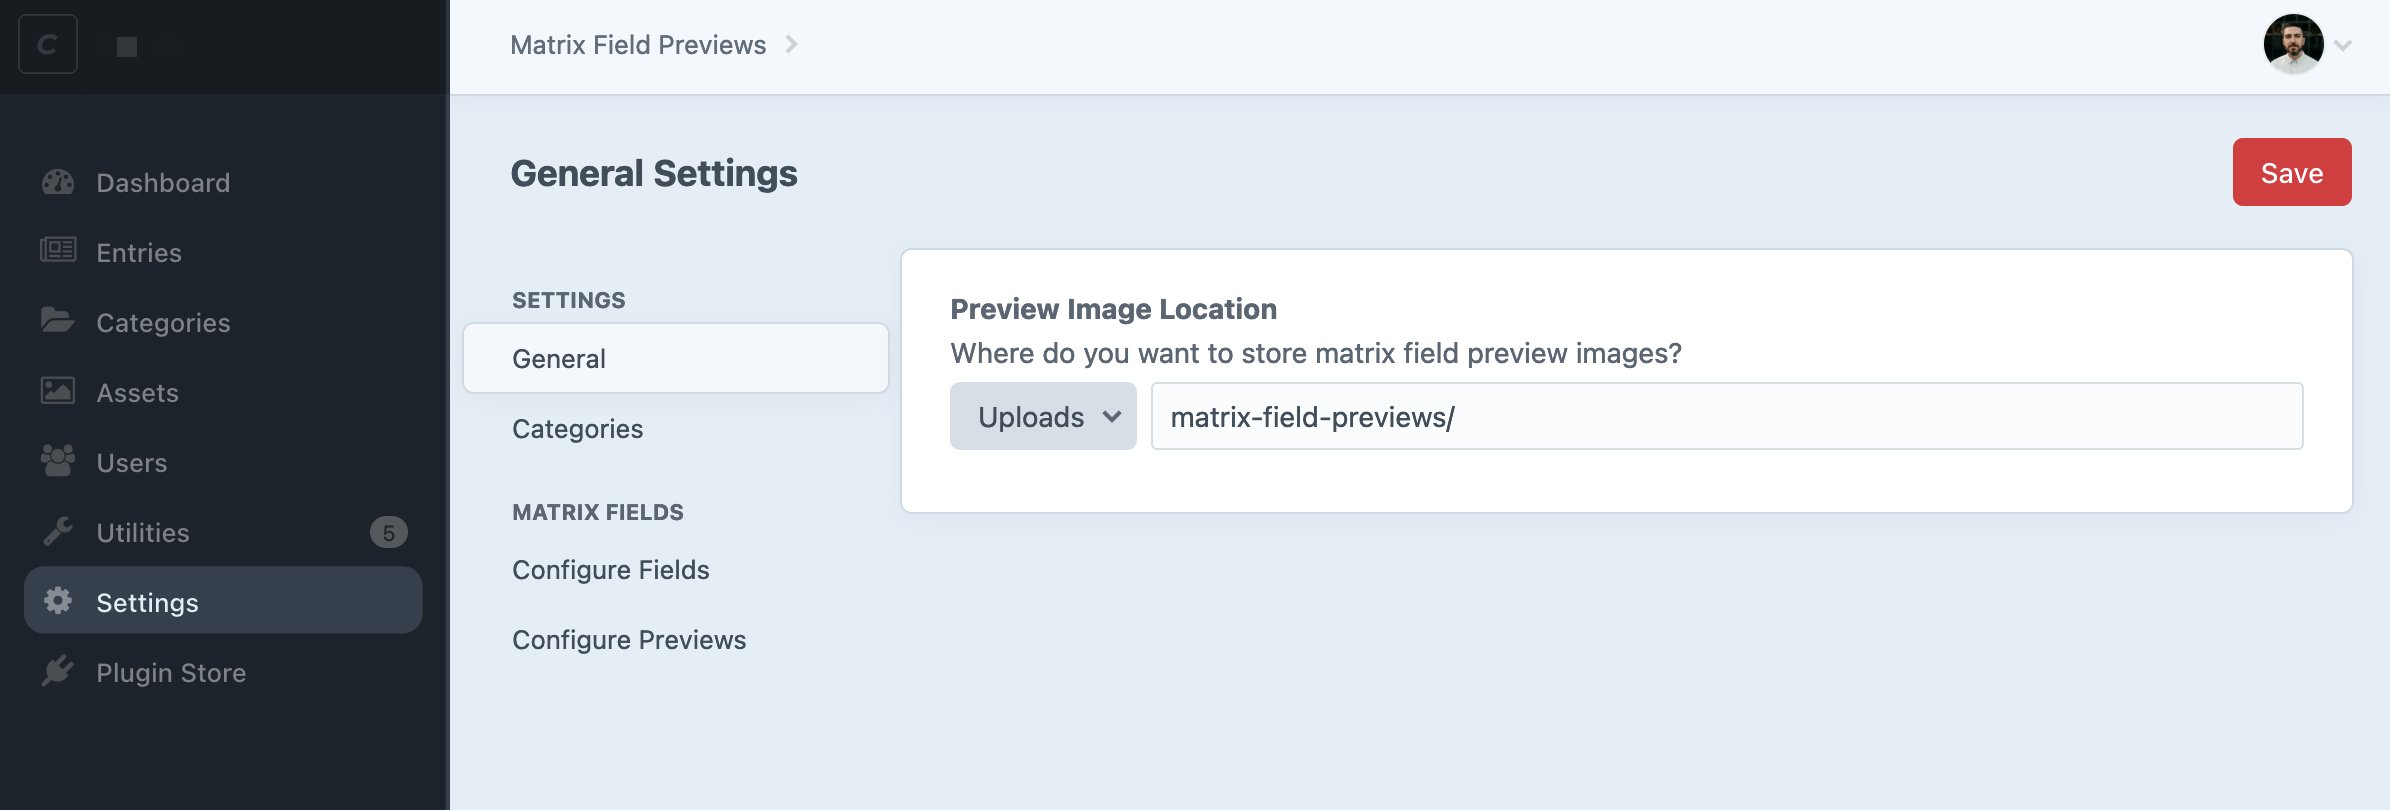
The first step is do decide on where you want uploaded files for the plugin to be saved. Go to the plugin settings page and the General link in the sidebar.
Here you can define a volume and optional path to save your uploads
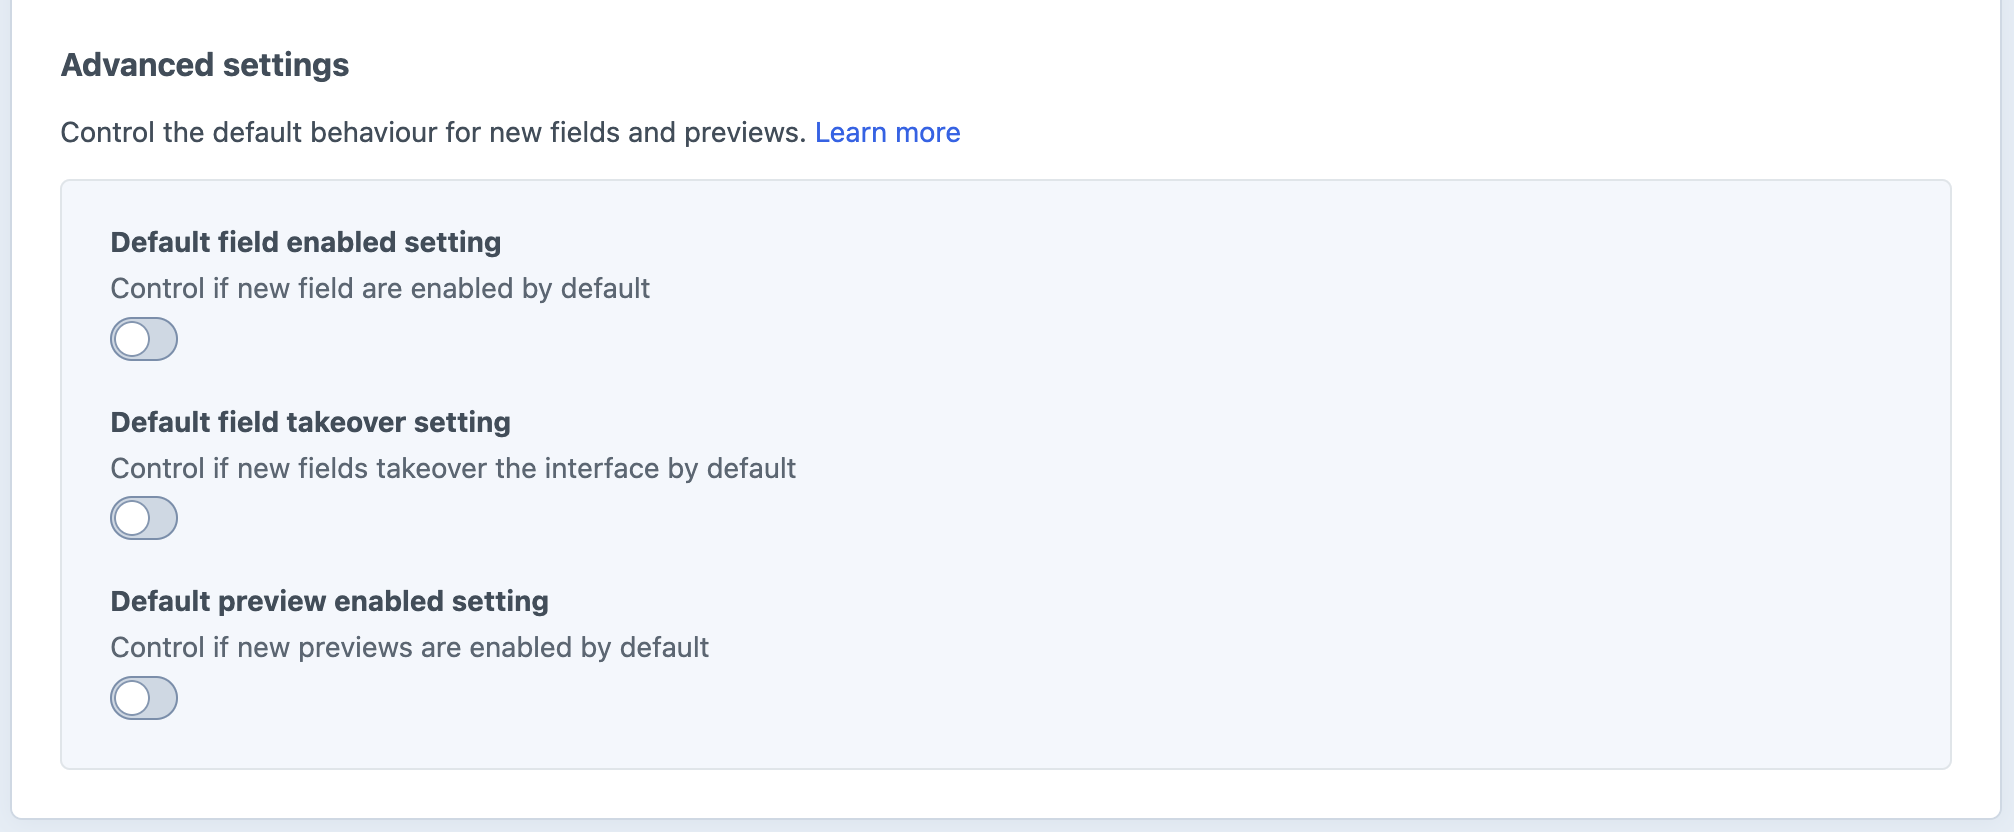
Advanced configuration
You can configure the default values for new fields and previews in the "advanced configuration" section.
For example, if you have a number of matrix fields configured or planned, but you're only using one where you want to feature preview images, you can set the default "enabled" setting to false so that previews are disabled on new matrix fields.
Configure fields
The next step is to decide on which matrix fields you want to enable previews on along with how you want them to appear.
Go to the Configure fields link in the sidebar:
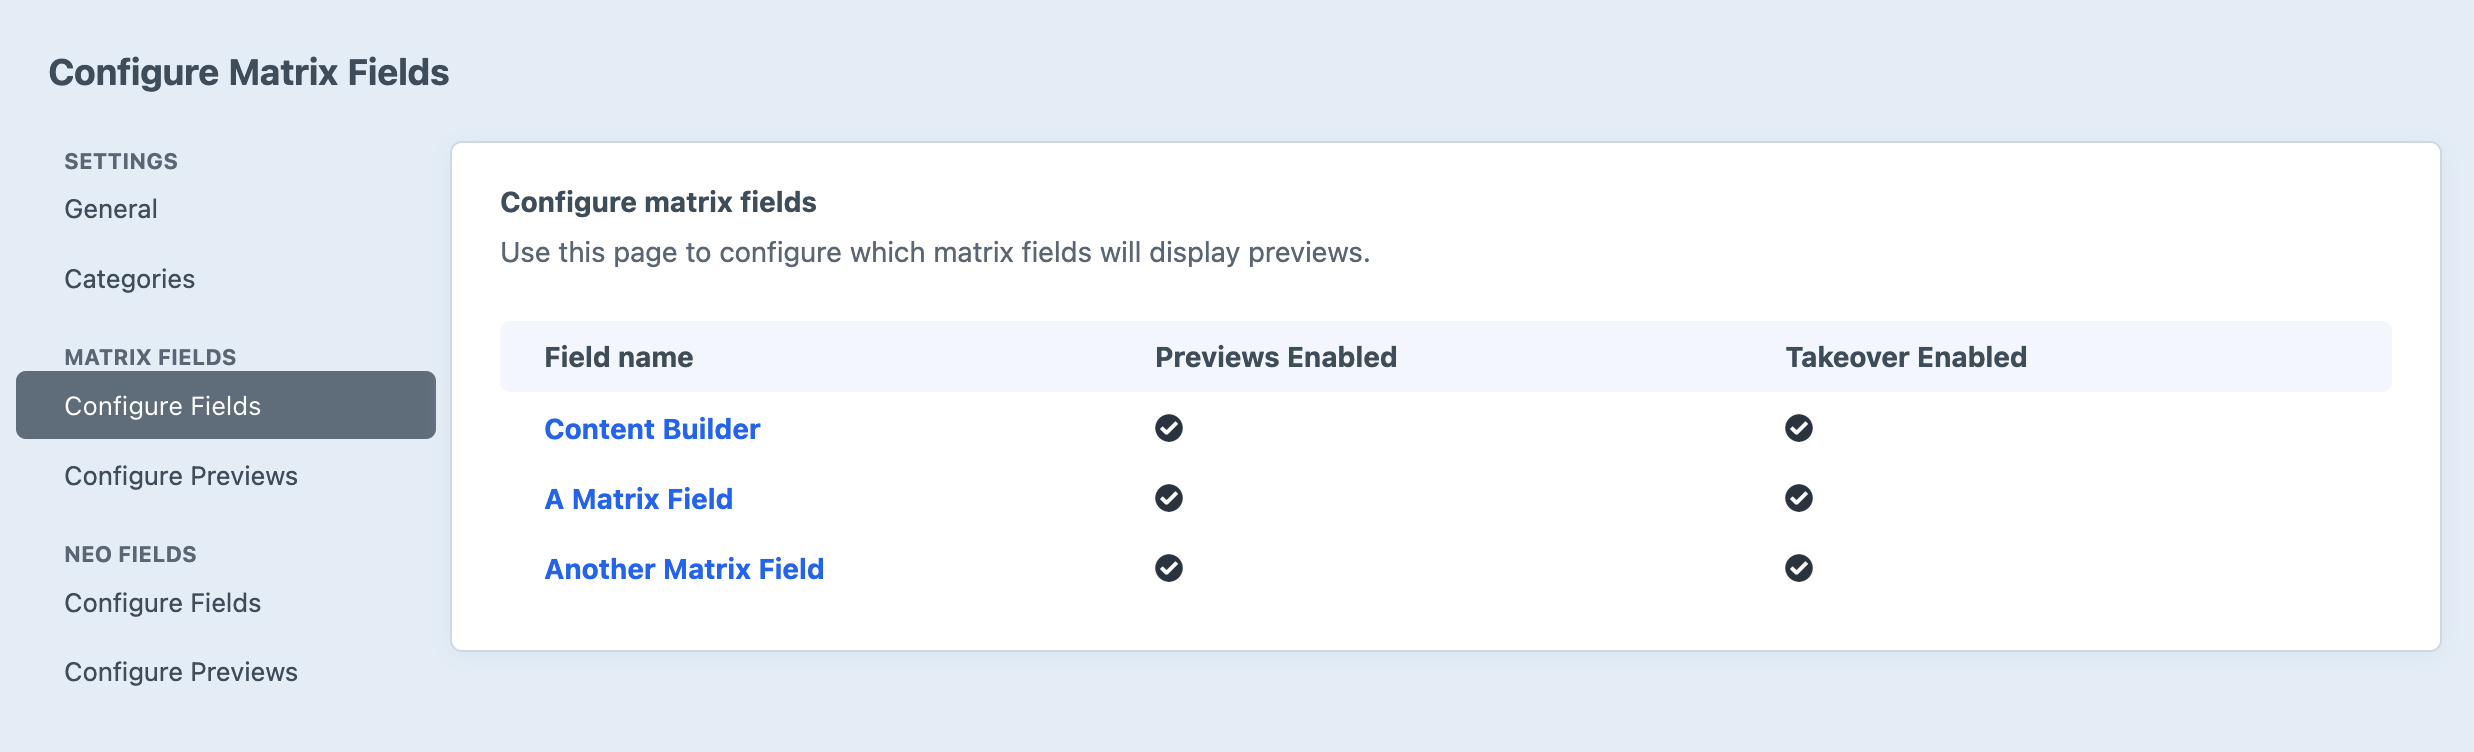
You can click into each individual field to configure it:
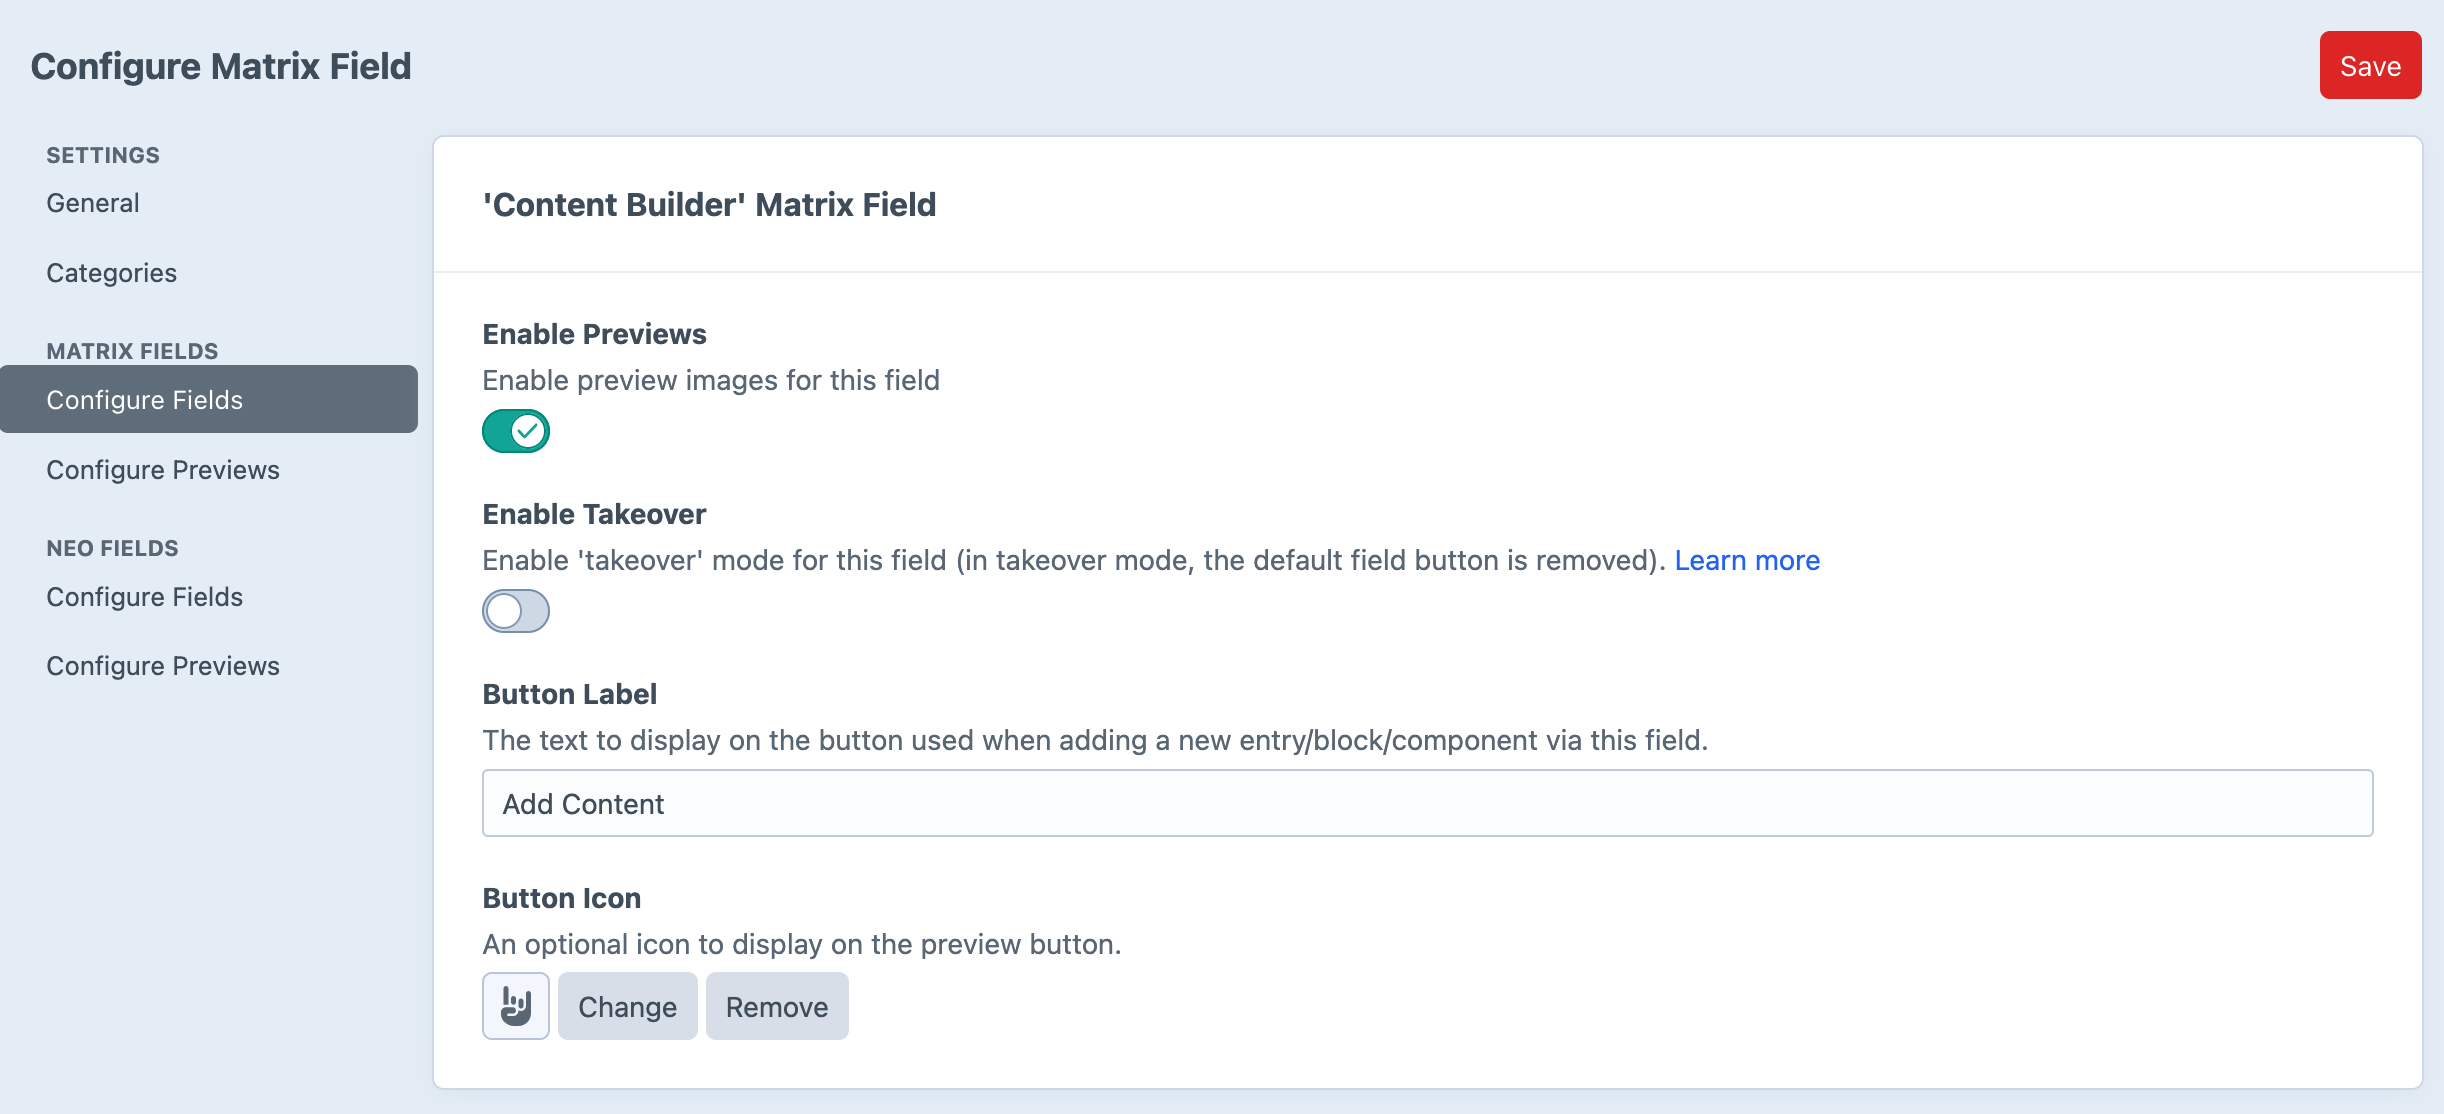
Enable/disable preview
Control whether or not preview images appear for this matrix field.
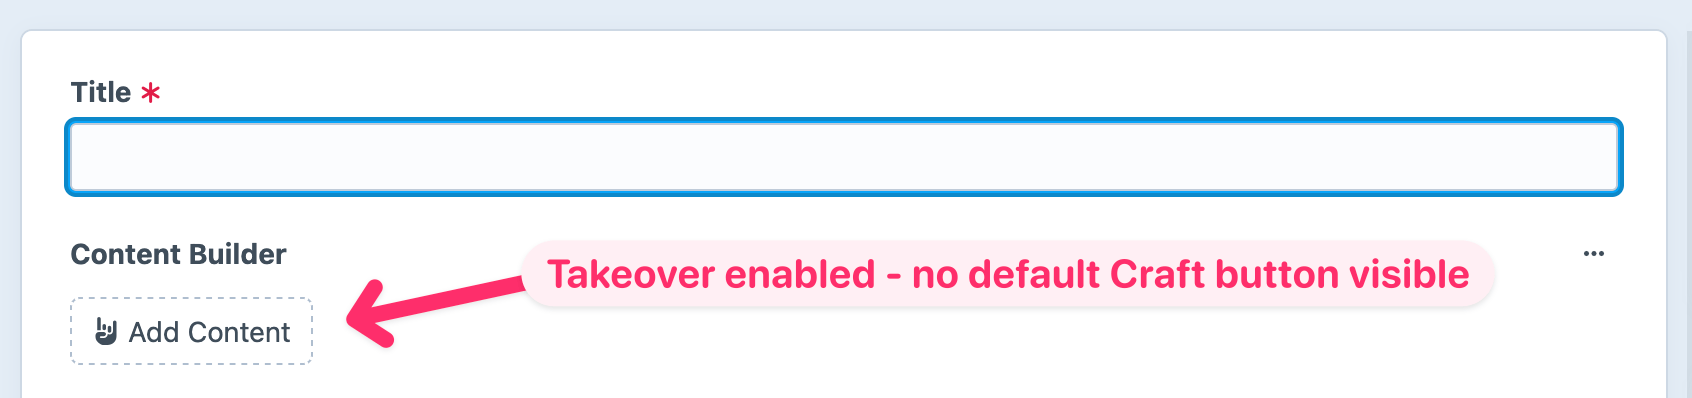
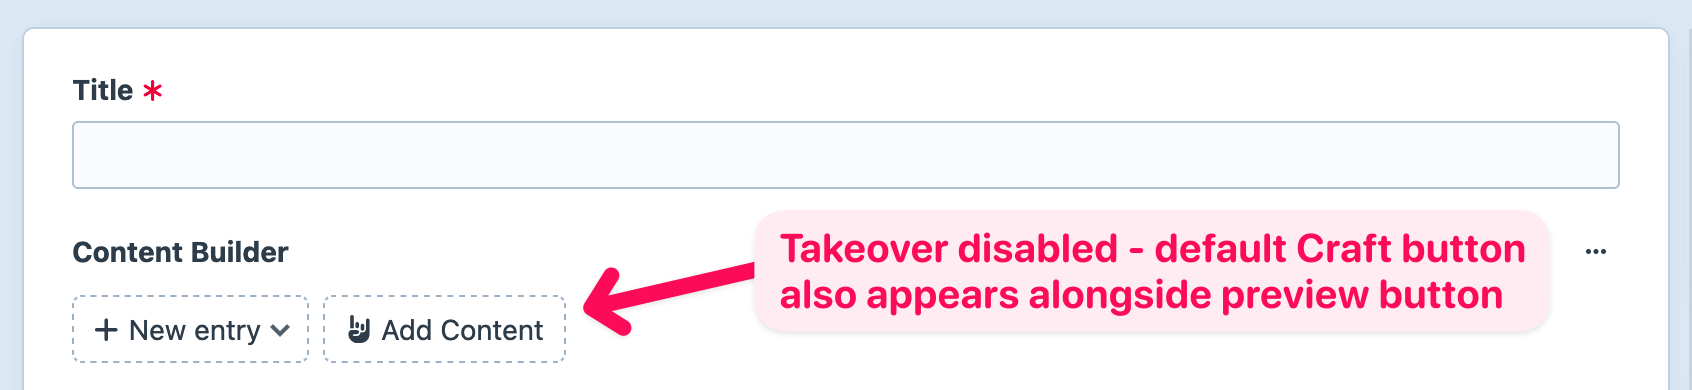
Takeover
You'll also see an option for "take over". This allows you instruct the plugin to completely replace the dropdown button on each matrix field or whether to just augment the button by adding a "preview" button alongside.
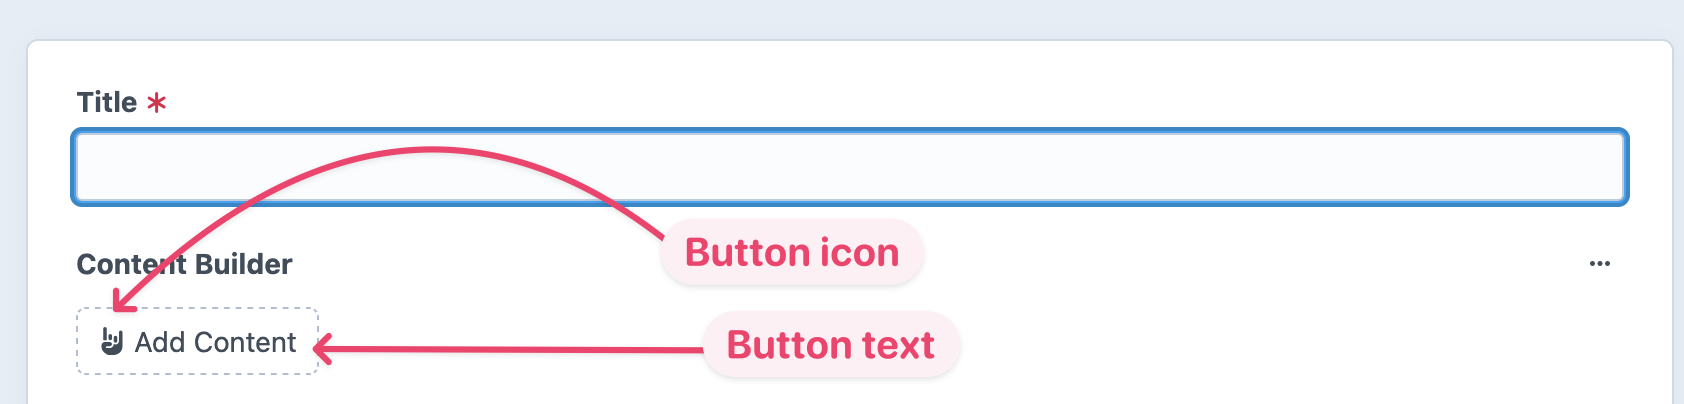
Update button text & icon
You can customise the appearance of each preview button individually by setting custom text or choosing a unique icon.
Configure previews
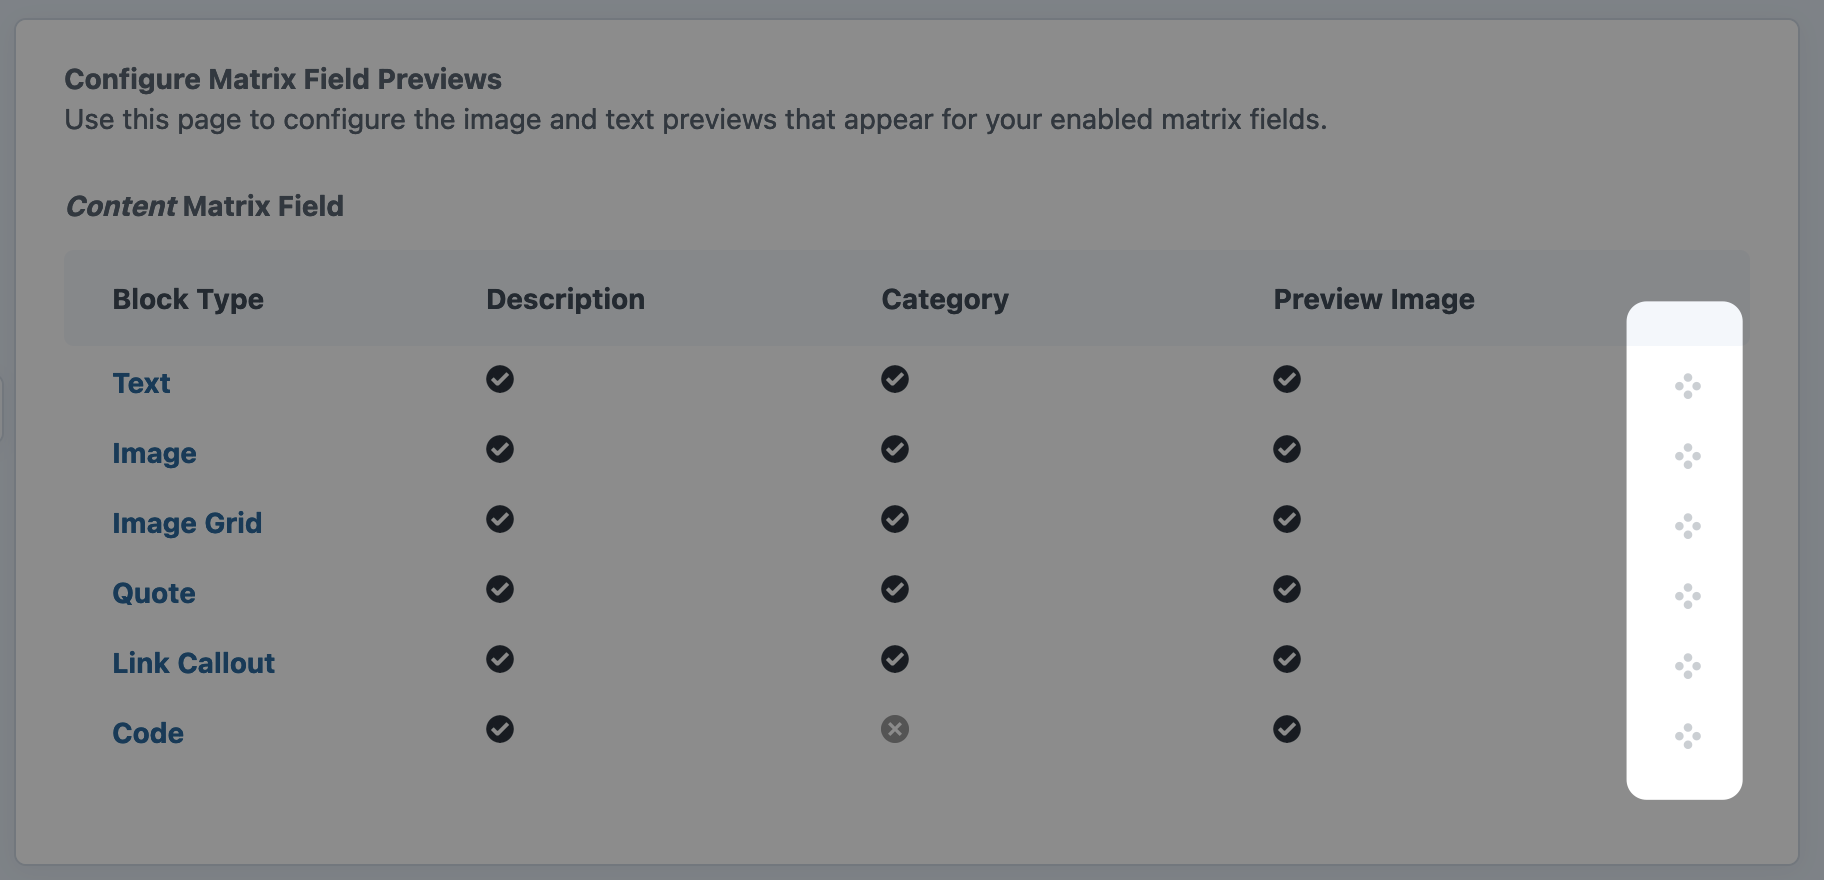
In this final step, you actually upload and add your previews. You'll see a list of all of the matrix field block types that you currently have configured for your site:
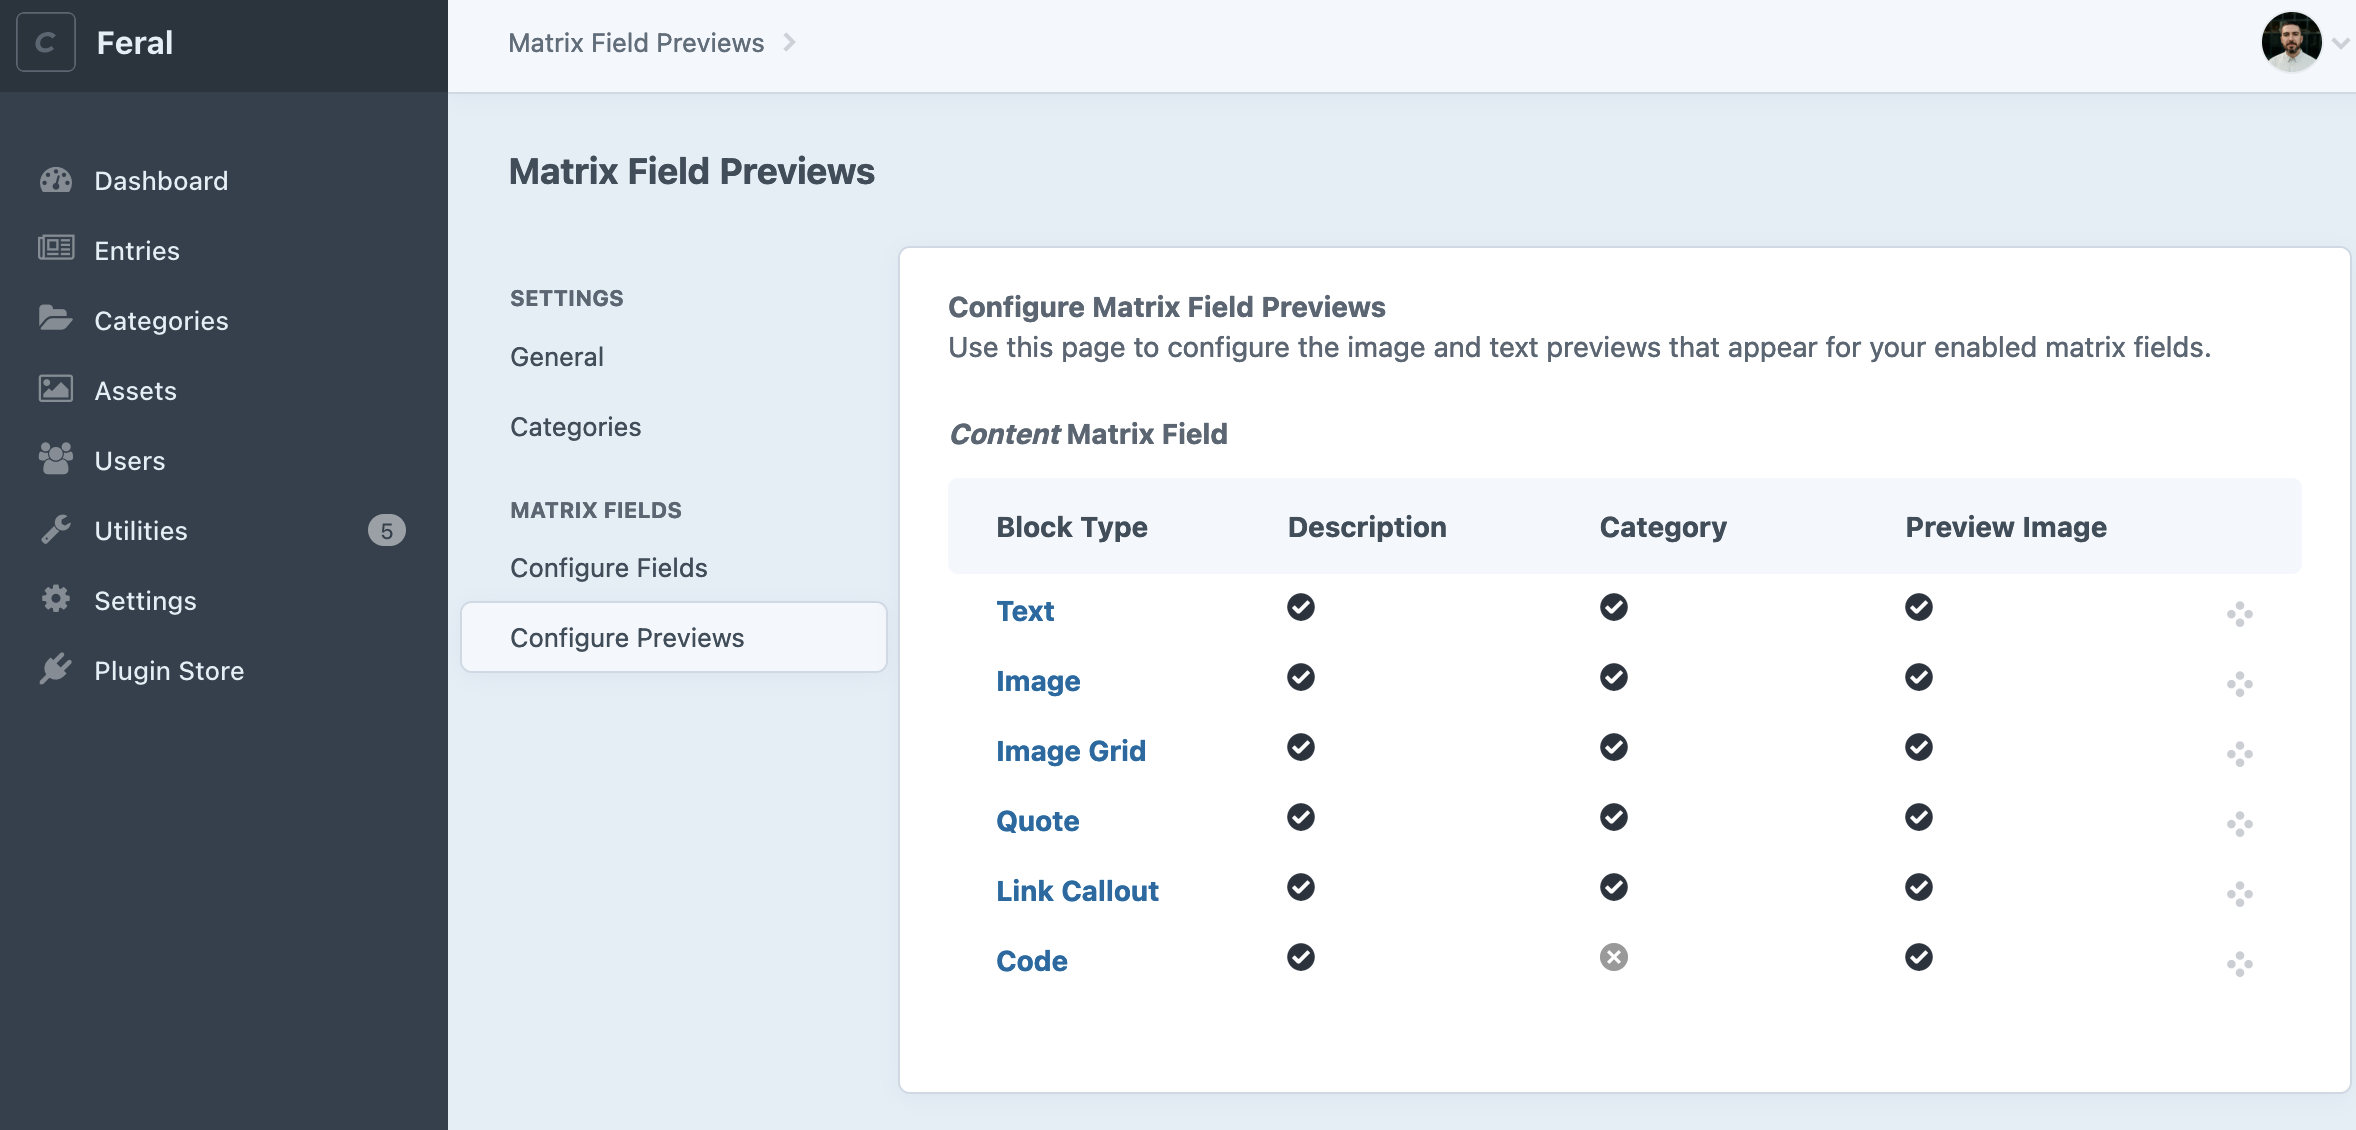
This page shows at-a-glance which fields have been configured with previews.
Click into each individual block type to set the description, category and/or preview image:
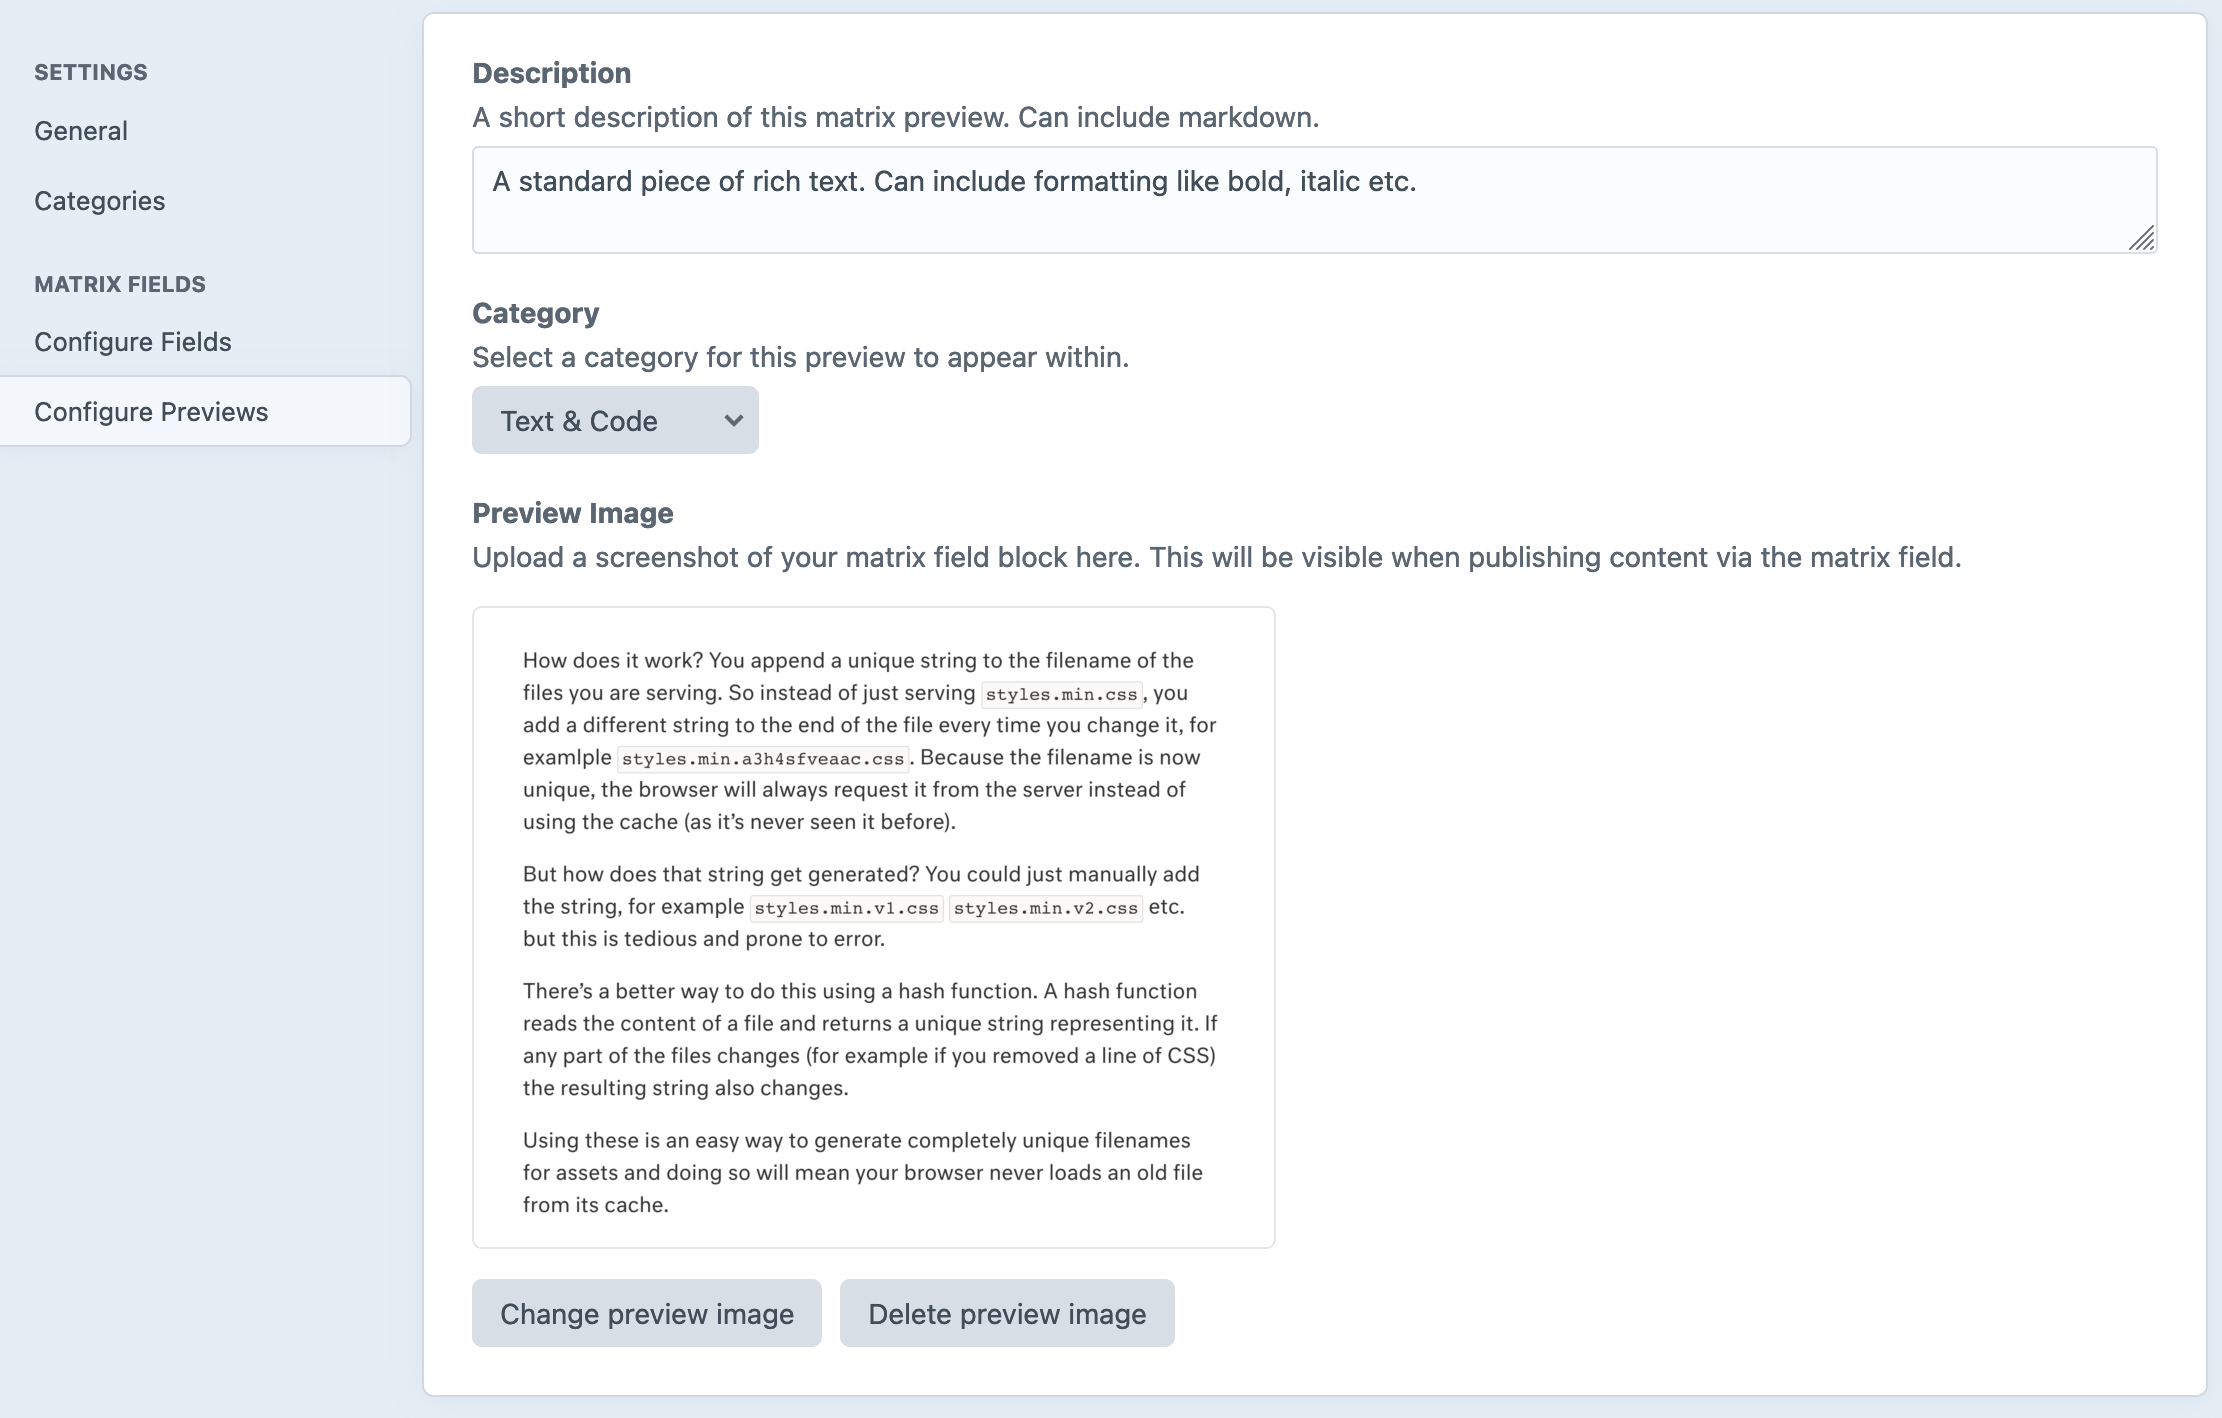
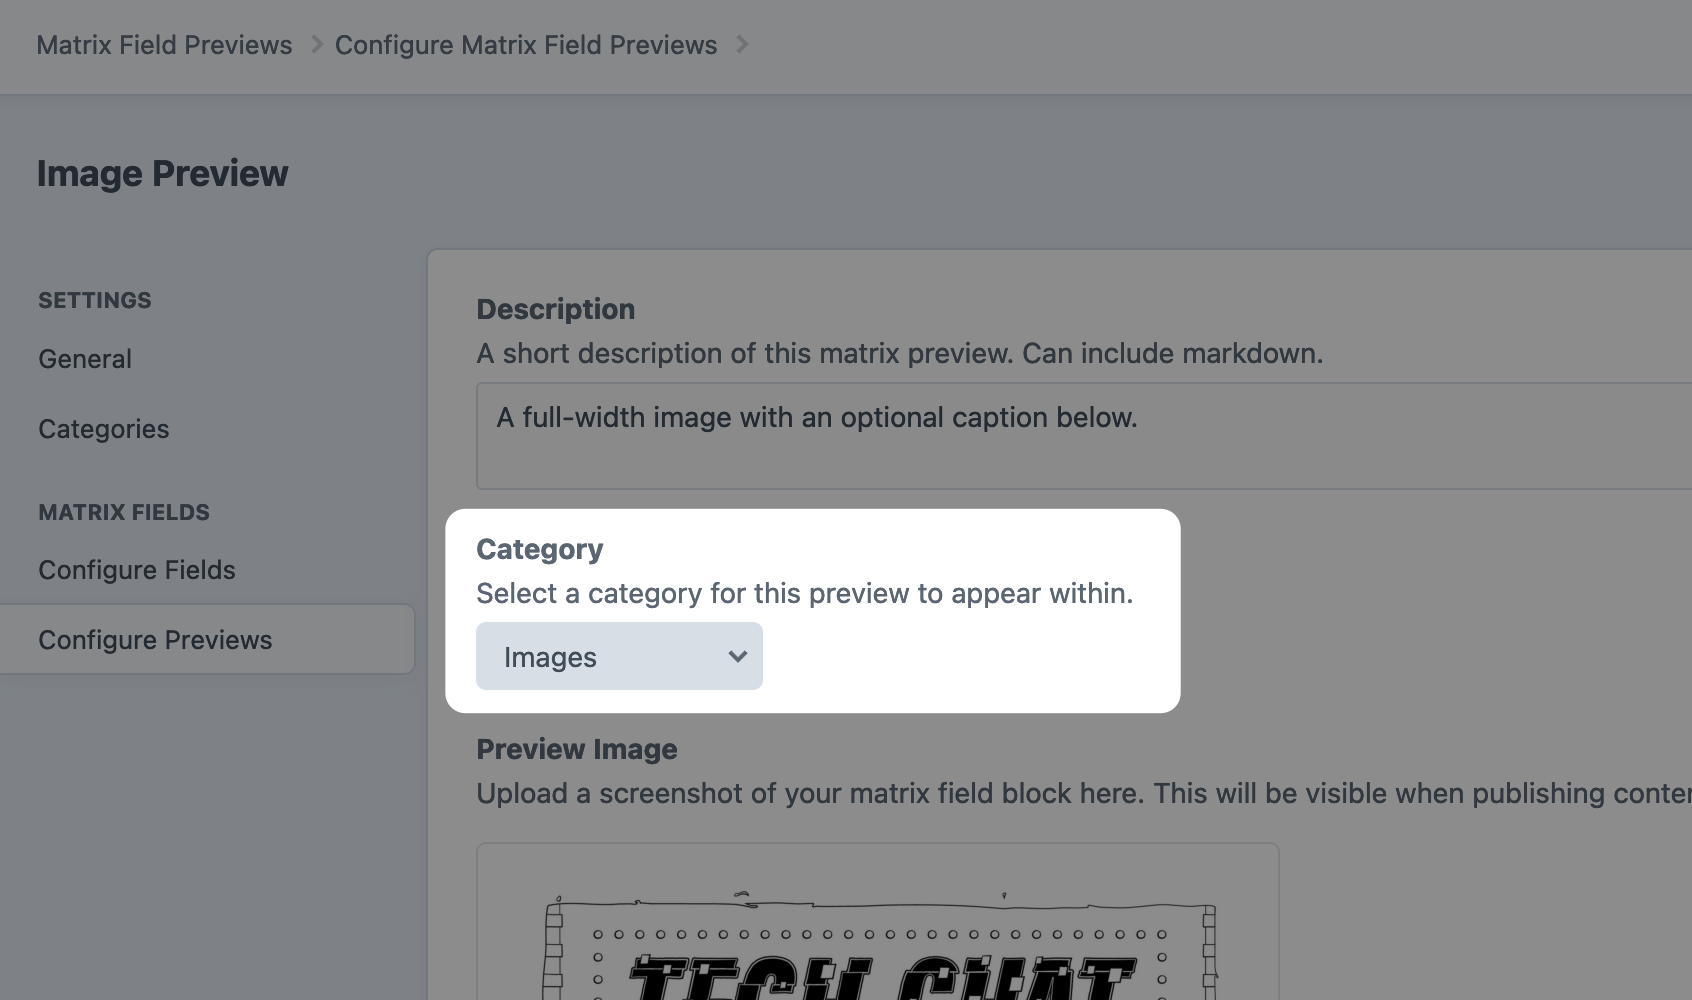
For each block type you can add a description a category and an image.
- Descriptions will show up on both the inline previews as well as the preview modal overlay
- Categories can be used to organise particular matrix field blocks into more logical gropus, for example "CTAs", "images & galleries" etc.
- Images are the actual screenshots that will display in the matrix fields when using the plugin whilte publishing.
- You can also use GIFs instead of images for a more dynamic preview.
Advanced configuration
Categories
Categories are an optional configuration step that let you place your previews into logical groups. This is useful when you have lots of different matrix field blocks and want to make them easier to digest during the publishing experience.
There are lots of potential categories for common content sytems:
- CTAs
- Text based blocks
- Images & galleries
- Heros
- Layouts
- Buttons
- ...
To create categories first go to the Categories sidebar link. Here you can add (and sort) your categories:
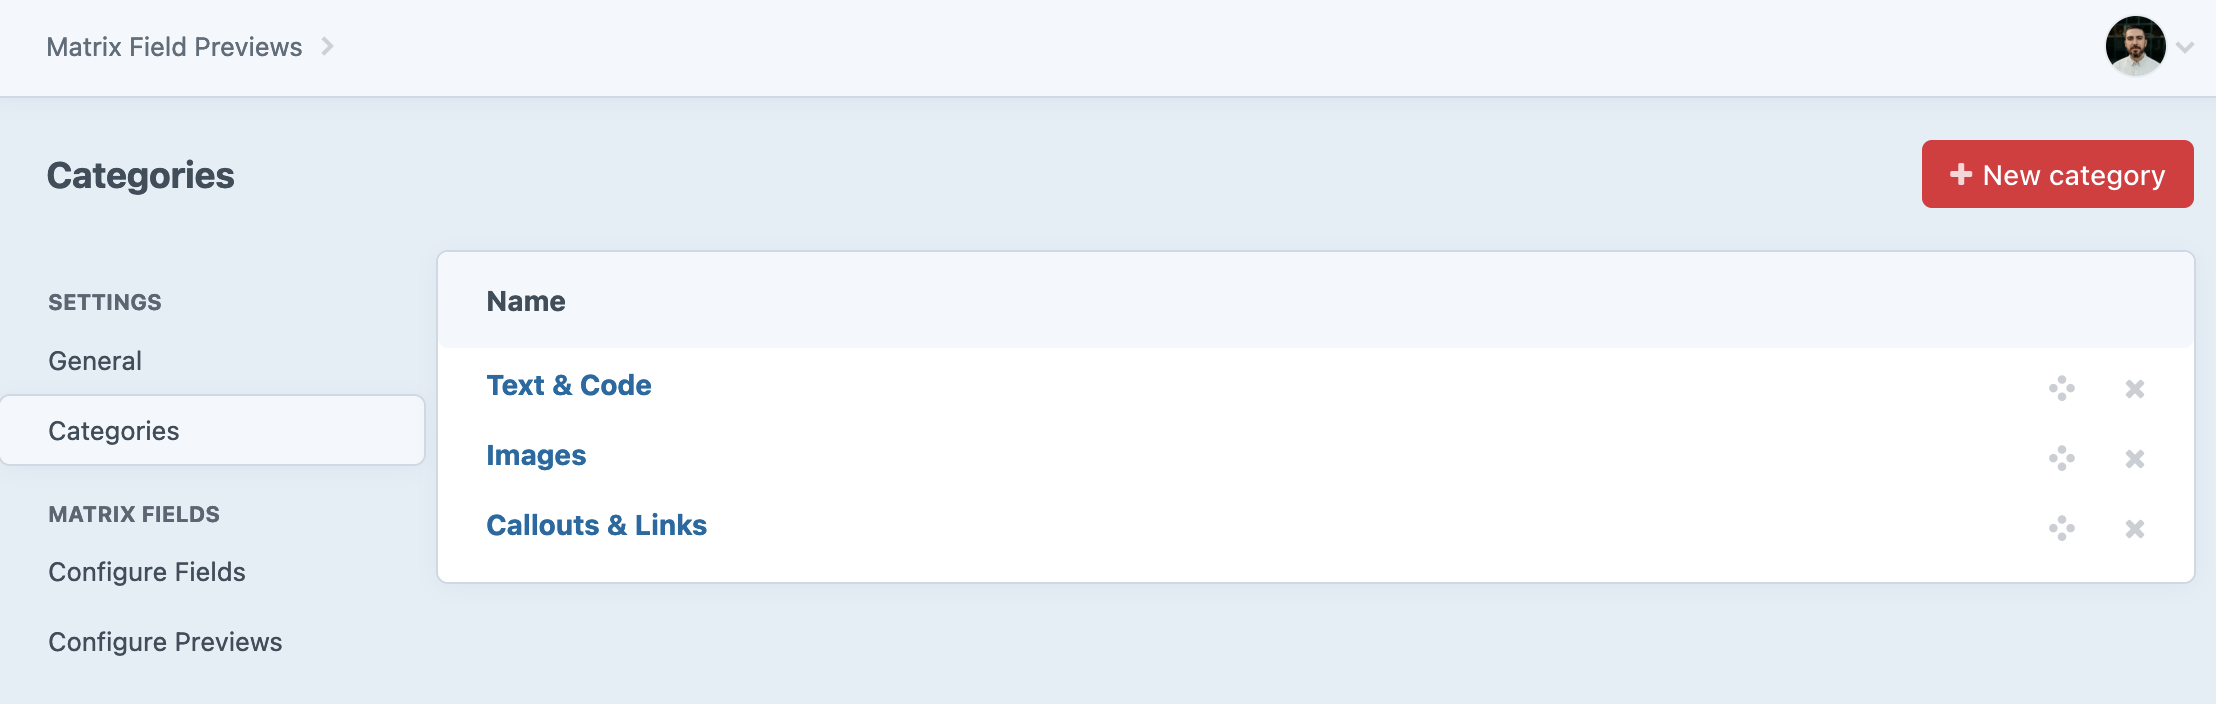
You can then select your new categories when adding previews:
Ordering matrix field blocks
When viewing your previews, you can reorder the blocks here by dragging and dropping the clover icon on the right-hand side of each row. This will affect where that particular block appears in the modal preview interface later. This is useful for moving more commonly used blocks to the top for easier access.